Showing posts with label visible image. Show all posts

24 October 2017

Bubble fun with Visible Image stamps


Morning Crafty friends, it's a wet and slightly windy morning here in Bristol,UK and I'm feeling slightly under the weather but I will not let it keep me down, I will craft on.

Do you remember when you were a child using paint and washing up liquid to blow bubbles and pull  prints off the surface of the water? Well who said that it was just for kids?

Today I am sharing 2 cards created with this method and stamps from Visible Image.

I will talk a little about the mix of water, paint and washing up liquid at the end of the post, so stay tuned.


I use a vivid pink paint mix in a large ice cream tub to create the bubbly background, this gave me more surface area to create bubbles and allowed me to choose where to pull the print from. Once dry I stamped an image from the visometry stamp set in black ink and added a sentiment using the Smile-sparkle-shine stamp.

I drew a squiggly border with a fine liner pen around the edge of the white card and then layered it onto some smooth black card before adhering it to a white 5x7 card blank.

I love how the black border makes the pink pop.


For my second card I used a blue paint, water and washing up liquid mix in a tall round beaker to create a circle of bubbles. I then added a striking eye using the where-dreams-take-you stamp set. My sentiment is from the tomorrow-doesnt-exist set.  I used black Versafine ink to stamp both the image and sentiment as it's give a good coverage over the paint.

To use this method you will need; water, washing up liquid, paint (poster paint or acrylic) and a straw.

So, how much paint to washing up liquid do you use? Good question!

I did a bit of research on the internet and found several different answers to this.  I found that it's best to just experiment as depending on what type of paint and washing up liquid you use the effects differ. When testing out my mix I use scrap paper or envelopes from junk mail.

Once you've found the right mix why not try using different shaped containers to blow your bubbles in, or you could cut an aperture from some thick card and place it over your container which will allow the bubble so form your chosen shape.

Have some fun and see what you can create.

05 April 2017

World Craft Week Day 3..........perfectly flawed

Well today is day 3 of world craft week and I thought it would be a good idea to talk about mistakes and how everything can be rescued somehow.


At the weekend I sat down to create a piece of art and was really looking forward to seeing the vision in my head come to life on paper.  I decided I wanted to use some of my visible Image stamps along with my Faber Castell Gelatos to create and face surrounded by flowers.

I grabbed the following stamps


and started to create my masterpiece...........

It quickly became apparent that I wasn't achieving what I had planned and I needed to save it somehow (I hate to throw anything away or give up on a project)

This is what I created


I cut the face away from the centre of my page to create a floral frame and then tore the eyes from the face (these were the best  2 piece)  I decided to go with the Perfectly flawed sentiment as it seemed to fit my happy little accident.


I am actually happier with my finished piece than I think I would have been with my original idea.

28 March 2017

Visible Image Angel - Mono printing

Today I am sharing a print I created using the Gelli Plate from Gelli Arts which I then added a stamped image to using Visible Image Angels stamp set.


I used Pebeo acrylic high viscosity paint which I added to the Gelli Plate using a brayer,  I used shades 55 and 352, I then layerd some smooth uncoated card on top to pull the print.

Once dry I used versafine onyx black pigment ink to stamp the large Angel image, you will notice that the image isn't as dark and crisp as it normally is with Versafine, this is because one of the paints I used was metallic, I like the look it gives, it's almost ghostly.

Next I added some black paint through a stencil to encase the image, I also added some Nuvo Jewel drops from Tonic studios. All that was left to do was add the image to some brushed gold cardstock.


I really like how this project turned out and plan on using the image in a box frame as a piece of home decor.

I'll be back tomorrow with another project.

06 March 2017

Mono printing and heat embossing, just another day of carfty fun.


Today I am sharing a card I made using my Gelli Plate, Acrylic paint and Visible Image stamps.

I love to create Mono prints to use as backgrounds, there is an element of surprise with every print you lift, it's like unwrapping a gift on Christmas morning.

For this card I use 2 shades of pink and 1 blue paint, I added 3 small pea sized blobs of each to the Gelli plate randomly and then used a brayer to spread them. I then placed some white card on top and rubbed it over and peeled it back to reveal this stunning print.


Once dry I trimmed the card down to my desired size and used the spare to stamp out my sentiment which I heat embossed in black and then cut out. I like to use the same background paper as it adds a common theme/feel to the card.  I mounted the words onto foam pads to add dimension.


Next I stamped this image onto the right hand side of my card and heat embossed it in black, I love the stark black against the very bright and girly pink.


Using a black fine liner pen I added a hand drawn border around the main card, This frames the image and stops it from looking as though it was just dropped onto a white background.


If you've not tried mono printing before I'd definitely recommend having a go, it gives you another way to experiment with your creativity and create beautiful pieces of art.

I'll be back with more crafty makes soon

Terri x 


07 February 2017

Wax crayons and blowing bubbles, I'm a big kid at heart.

Good morning crafty friends, today I am sharing something a little different with you.....

I recently won a gift voucher to spend at Visible Image Stamps, yay I love their stamps. I decided that I would get myself the Sparkle in the rain stamp set and one of their sentiment sets. Today I wanted to show you how I created 2 projects using one stamp set.


For my first project I used a canvas board and a wax melting technique.  I started by stamping the Lady in Versamark Ink and heat embossing her. I then cut and folded a temporary canopy to go over the umbrella as I didn't want the wax to go over the stamping.


I then used cheap, really cheap wax crayons and melted each colour a little letting it run down the Canvas board. I love the effect it creates.


For my second project I have made a card, I created the background by blowing bubbles, yes you heard me right blowing bubbles......   I mixed some acrylic paint, washing up liquid and water and blew into it with a straw. As the bubbles reached the top of my container I placed some card on top, I repeated this twice more as I wanted 3 colours in the background.


Once dry I stamped my main image in black and then added the rain details in Versamark Ink and heat embossed with clear sparkle embossing powder.


I love thinking of different ways to use my craft products along with other things I already own at home. I home I've sparked your imagination.

16 January 2017

Just be happy - Gelli plate print


I'm sorry I've not posted sooner but I been busy with a million and one things (Dr's, School, Children and DIY to name a few)  I did however manage to grab a few moments to make a little card.

I used some Pebeo high viscosity acrylic paints to take a print from the Gelli Plate, I choose a vivid green and pink, both of which are iridescent. Once dry I stamped my sentiment and image (Visible Image stamps) in  Versamark ink and applied black embossing powder which I then heat set.

I opted for a simple black and white matting and layering combo to set off the imagery.

I hope you like it as much as I do, I thinking I might just pop this into a little frame and keep it close for all those times where life can get to busy and overwhelming and I need a reminder to "Just be happy"

I'll be back Wednesday with a sneak peak at a new design team project

Terri x 

09 January 2017

Even in our darkest moments - Gelli Plate and Visible Image card


Hi Guys, today I am sharing a card made with copper embossing powder. So this year Copper is going to be BIG in craft so I am told, I thought it would be good to use the copper as my glimmer of light in this card.


I created my background using the Gelli Plate and Pebeo paints. I then added my images and sentiments using the Glimmer of light stamp set from Visible Image. I used a Versafine pen to add detailing along the top and bottom of my card. I aslo glazed the light bulbs with Glossy Accents to add a glass effect.


I hope you've enjoyed today's post, take care.
Terri x

08 January 2017

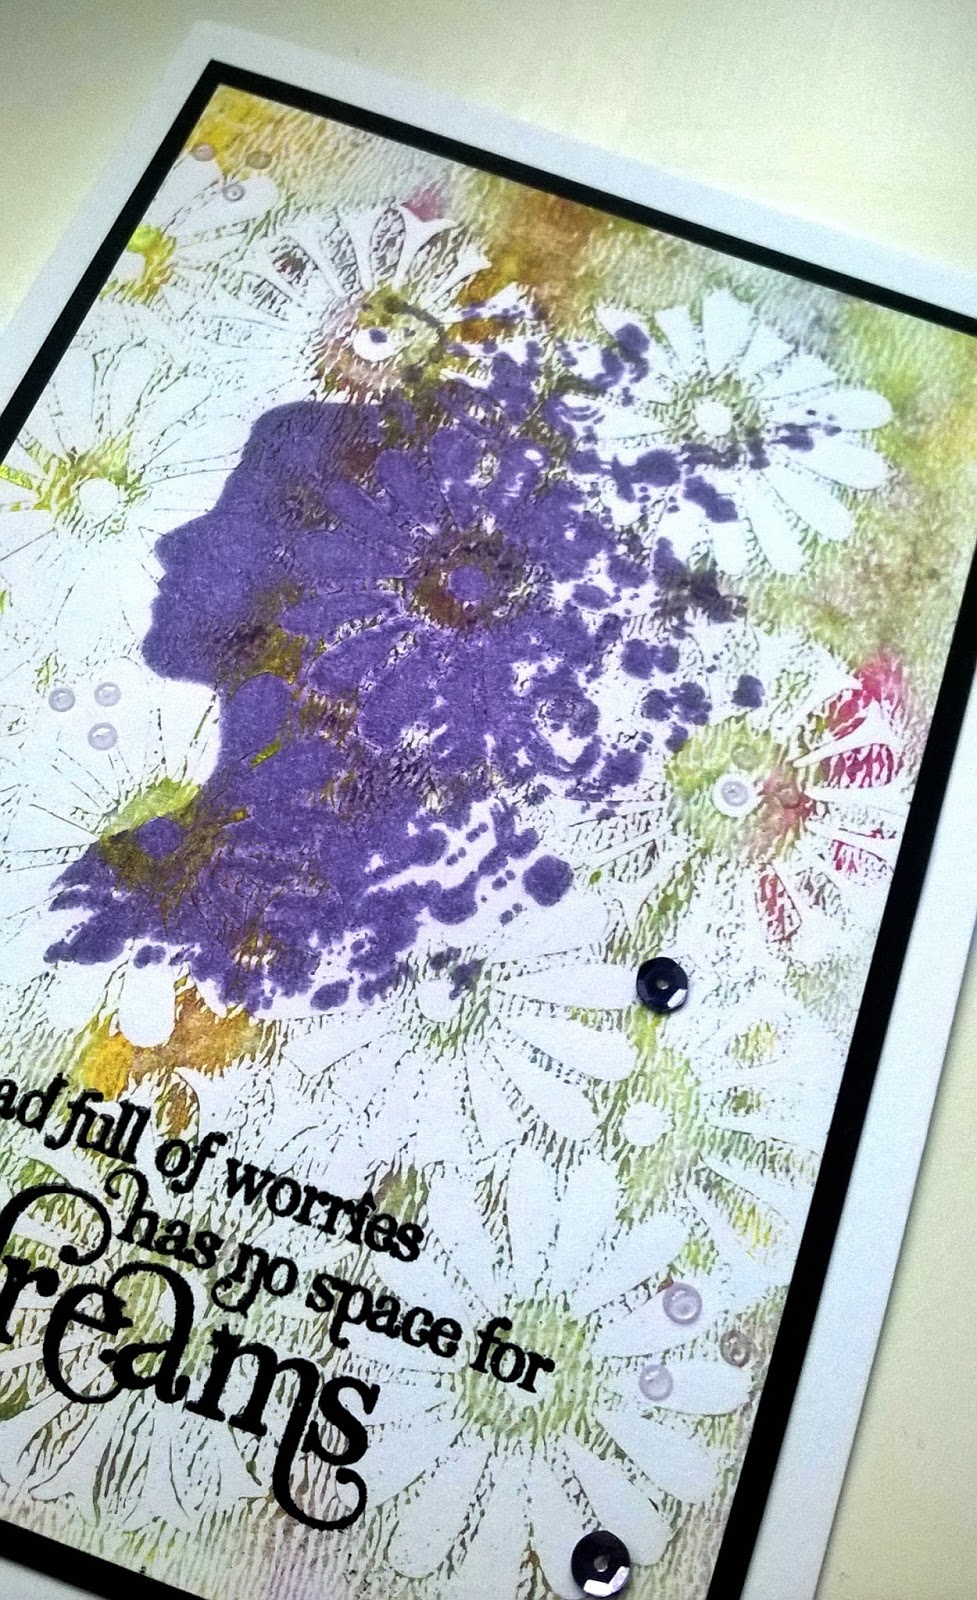
A head full of worries - Gelli Plate and Visible Image card


Today I am sharing a card I created with the Gelli Plate from Gelli Arts and Stamps from Visible Image. I wanted to create a card with a soft dreamy background to reflect the sentiment.


I created the background with Pebeo Acrylic paints and a flower stencil on the Gelli Plate.


Once dry I stamped the sentiment from the No space for dreams in Versamark ink and added black embossing powder and heat set. I stamped the head image in a water based purple ink and then added some sequins and Jewel drop from Tonic studios Nuvo range.


I love the distressed feel of the background, I achieved this by taking 2 mono prints from the Gelli Plate, this was the second, therefor there wasn't so much paint left to lift from the surface, it's definitely a technique I will be using again.

Thank you for taking the time to visit my blog today, 

I will have another Gelli Plate and Visible Image card to share with you tomorrow;

Here's a little sneak 


I hope you'll join me for the full reveal.

Terri x


06 January 2017

The writing is on the wall; Gelli Plate background


Today I am sharing a card I created using my Gelli Plate and some Visible Image stamps. I wanted to make this card to both show that grunge stamps can create a feminine effect and to convey a poignant message. 
There have been so many high profile deaths in the media in the last 12 months and several of us have also lost loved ones, at times like this I think we all need to be reminded to make the most of our lives and "Live like tomorrow doesn't exist".


To create my background I used my Gelli Plate, a brayer  and some Pebeo paints


I have used 2 colours of Pebeo high viscosity studio acrylics, Buff Titanium and Iridescent blue green. I love these paints as they are thick and creamy which is perfect for mono printing.


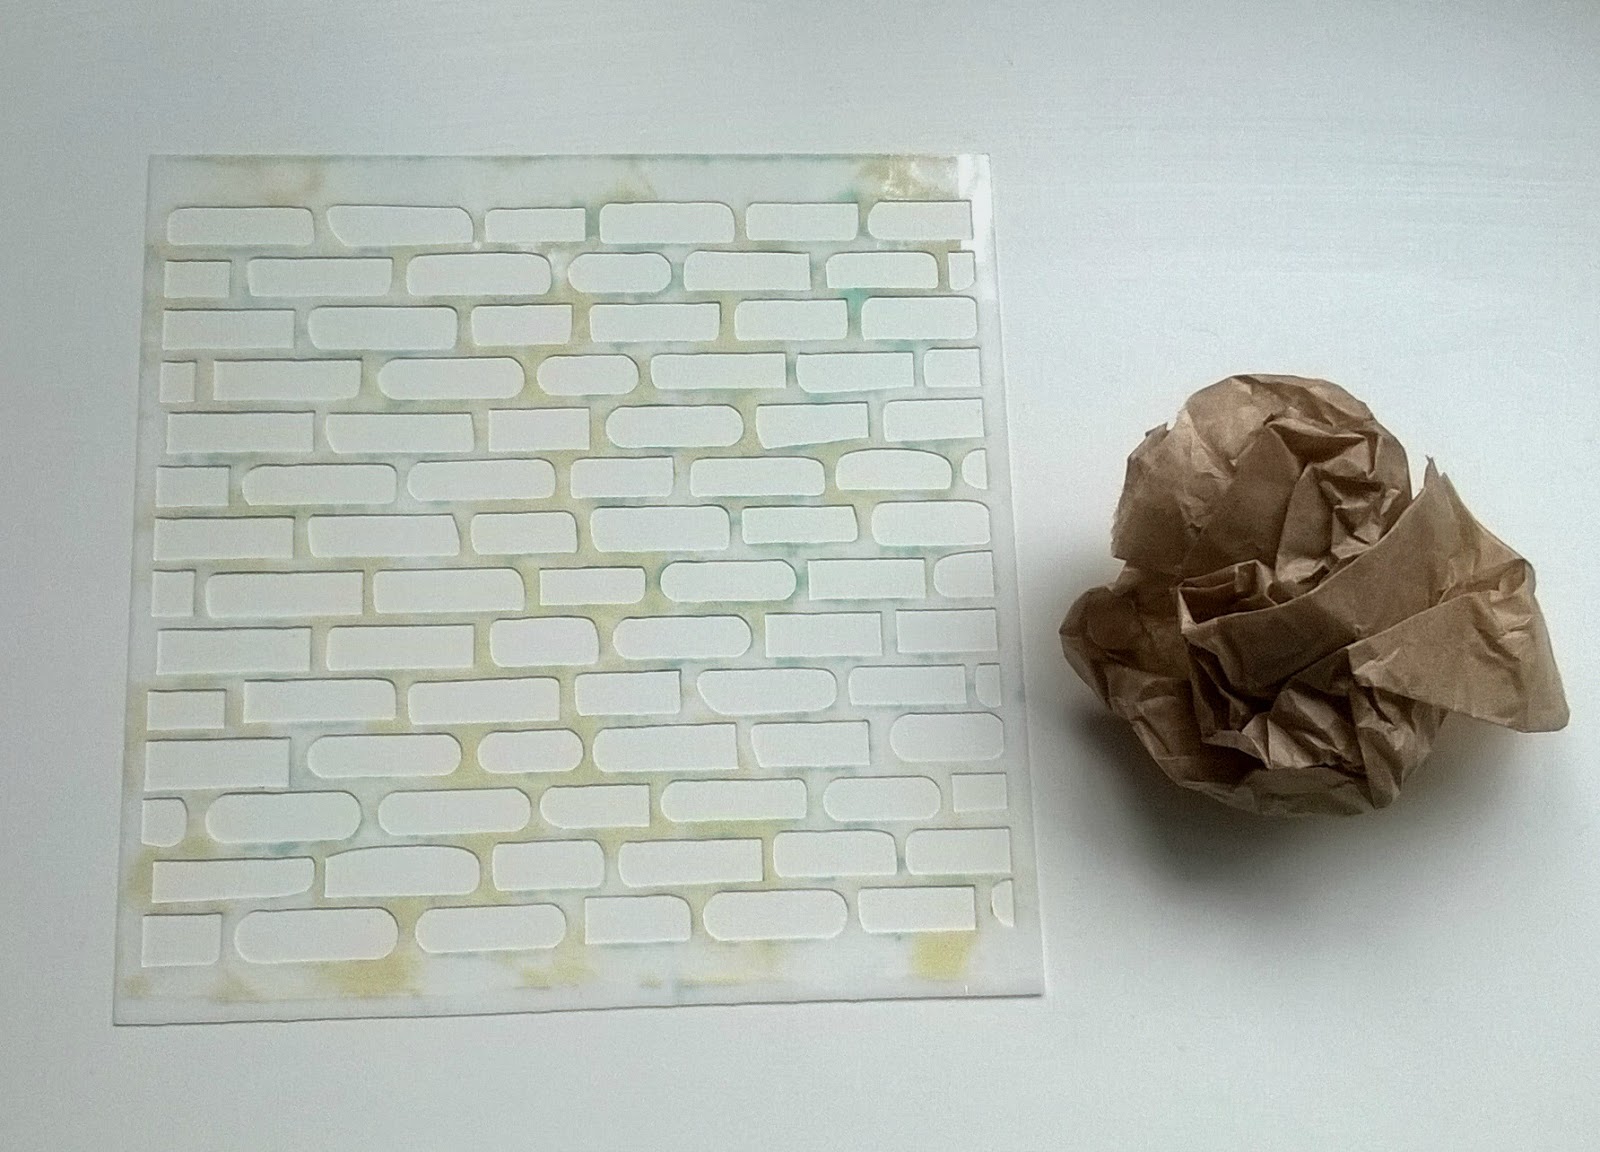
To create the brick wall  I used a stencil and some scrunched up baking paper. I started by coating the Gelli plate with a layer of the Iridescent blue green using the brayer, then I placed my stencil on top. Using the baking paper I dabbed into the gaps to lift some of the paint away, I then removed the stencil and allowed this layer to dry.

Once it was dry enough I added a layer of the Buff Titanium, I then quickly put a piece of smooth white card on to the Gelli plate and rubbed over the surface to make sure I got a clean lift when I remove the card.


Next it was time to add some stamped images and text, for this I used  Visible Images Tomorrow doesn't exist and Ink splats stamps.


I stamped the text on to the off cuts from my background and cut them out and mounted the words on to some foam pads. I like to have a little dimension in my cards.


I added some clear embossing powder over the Ink splats to give shine and reflection. I then distressed the edges of the main brick panel and mounted it on to some vellum and attached it using mini brads. This was then placed on to a white 6x6" card blank.


Thank you for taking the time to stop by and visit my blog, I'll be back soon with another crafty post.

Terri x

22 November 2016

Fill your head with dreams not worries

Today I am sharing a piece of wall art I've made using Visible Image stamps.

I was inspired to make this as my youngest daughter is a worrier and I often find myself telling her not to worry and that there are better things to spend your time on.


I love the Dream Cather Stamp in the No space for dreams set.  I also used the Ripped Fishnet from the Background Noise set.  I created the background on my Gellipalte and ued a stencil to add the  dot detail. 


I added some details with a Spectrum sparkle pen, Sakura star dust pen, gold Posca pen and Glossy accents.

I think I will frame this and place it above my daughters bed as a little reminder not to worry.

T x


25 September 2016

Live life Now - Visible Image

Today I thought I'd share something a little different,  a wall hanging that I created last week using Visible Image stamps and the Gelli Plate.

I had a idea that I wanted to create something that expressed a poignant message while being a bit fun too............


I had created several black and white prints on my Gelli Plate and knew I wanted to do something a little different with them so I started by tearing htem into strips and gluing them to a piece of hardboard using Mod Podge Matte finish. I also cut several hexagons from the same papers and added them. Once dry I highlighted areas where papers met using a White Posca pen.


I used one of the skull stamps from the "Mr Bone Jangles" set and heat embossed a few of them Using White embossing powder.  I also embossed some Ripples from "The ripple effect" set but this time used Black embossing powder.


I stamped, embossed and fussy cut Mr bone jangles himself to add to the hanging, I wanted a little more texture behind him so placed him on "tuck in" die cut from Tattered Lace.


I added some distress ink to Mr Bone Jangle so he wasn't to stark and looked more muted. I also wrapped the edge of the board with Duck tape.


I stamped embossed and cut out a sentiment from the "Tomorrow doesn't exist" set and added the to the left of the hanging, again adding some distress ink to continue with the colour theme.


The sentiment "Live like tomorrow doesn't exist" together with the skeleton gives us all a reminder that we need to live now and enjoy our lives...........(wow, that got a little deep)

Here's a list of the stamps used to create this project;


Thanks for taking the time to stop by, I'd love to know what you think of my project so please leave me a comment T x

19 September 2016

Even in our darkest moments

Thank you for stopping by to check out my most recent make.


Today I am sharing a card I made using my new Gelli Plate and Visible Image Stamps.


I started by creating a background on the Gelli Plate using Pebeo Acrylic paints and Bubble wrap.  When it was dry I stamped the hanging lights in Versamark Ink and heat embossed them with Black embossing powder.  I also heat embossed the sentiment in the same way.


The small moths were stamped in black Versafine ink. I created another mono print on the Gelli Plate this time in orange, red and yellow tones which I used to stamp the Large moth onto and then heat embossed in Black.  I decided that the Moth would look fab if it was fussy cut and had it's wings curled slightly.


I added some Mercury glass stickles to the light bulbs and then distressed the edge of the paper before matting it on to a 5x7" card blank.


I love the quality and detail of Visible Image stamps and can see hours of stamping fun ahead.

If you would like to purchase the stamps I used to make this card you can them here

T x

12 September 2016

Go where your dreams take you

Happy Monday

Today I am sharing a 5x7" canvas that I created recently.


I decided that I wanted to go bright and bold with the colours for this project, I can at times be a little cautious and stuck in a rut with my colour choice, just as I am in my clothing colours.....

I used acrylic paint applied with a sponge, I also applied some white paint through a stencil and splatted some using a toothbrush. When dry I added some glossy accents to add dimension and reflect the light.

Next I stamped the Inkognito eye from Visible Image and embossed it in black. I stamped the sentiment on white card and then tore it into a few pieces so that I could add it to the canvas and fill some of the blank space.

I really am happy with how this project turned out and I will continue to be bold with colour and follow my dreams.

T x

05 September 2016

Live life now

Good Morning

Well life is starting to get back to normal after the summer holidays, my girls went back to school this morning so that means more craft time for me....

Today I am sharing a card I created at the weekend using some of my favourite crafting items.


I created the background using Lindy's Magicals and then stamped the image and sentiment in veramark ink and applied copper embossing powder. The detailed butterfly was embossed onto vellum and fussy cut.


I love the dimension and feel of movement this gives the card.

I will be entering this card into Craft Stampers take it make it competition.


I used the follow products to make this card

Visible Image;

Lindy's Stamp Gang;

Papermania;

Thanks for taking the time to stop by, I'll be back later in the week with more crafty makes.
T x


31 August 2016

Inkognito stamps on a magical canvas

I am very excited and couldn't to share these projects with you so here goes

This morning my order from Visible Image stamps summer sale arrive and I had to play right away.


I had a couple of old box canvases from my daughter bedroom that she had outgrown (they had bunnies on and she a bit EMO now, lol) I wanted a quick flat black background and stumbled upon a tin of BBQ spray paint and set about spraying the canvases.

While they dried I mixed some white acrylic paint with Lindys drop dead diva magicals and a little water to thin...... I was aiming for pouring cream consistency. I did this for each of the 6 colours in the set, I used a cocktail stick per colour to mix.

Once the canvases were dry I stamped the image and sentiment in Versafine ink and applied white embossing powder. A quick blast with my heat gun and I was ready for the splatting.


I headed outside to splat as I am so messy and had other projects on my craft desk. I used the cocktail sticks to flick the paint at the canvases, I ofund that tapping it on the end of a finger also helps get a different size splat!


I gave them a little blast with my heat gun to dry the paint and then hung them on the wall. So quick and easy and I think they are very striking.


I used the following products to make the canvases


Thanks for taking the time out to stop by Tx