29 November 2015

Naturally Gorjuss - Tutorial 10


Good evening everyone, I hope you are all warm and safe out of this nasty storm.  Today I decided to make a natural looking card with a image from the Gorjuss range and wanted to share it with you so that you could have a go at making one too.


Here's how I made it;


I started with a A5 Kraft card blank and edged it with a dark brown alcohol marker


I used a Tonic studios tag die to cut a tag from some brown card


I then used the tag with it's oval inner ring to cut a patterned frame


The die set has a 3rd inner die which I used to cut a little oval mat which my image will sit on


I cut a little sentiment from brown card


To cut my image I used the inner most ring as a template I drew around it and cut it out with some scissors


Hand cutting a curved shape is never 100% perfect so I edged the image with a dark brown pen, this helps to detract from my wobbly cutting


I tied a little bow from 1 ply twine. I do this by making two loops and knotting them together as this results in the loops and tails sitting neatly opposite each other.


Now for laying the card up, I use hi tack glue to stick the brown tag base to the card


I then glue the tag frame in place


And then I added the oval mat


My image was cut from shiny card so I had to make sure to get good adhesion. A little added pressure while the glue grabs will help 


I then added my sentiment in the bottom as it makes you want to open the card and see who it's from


I then added some paper flowers to the corners and the bow I tied earlier


And here we have it, I think it's a super cute card and I love the natural look and feel.


I hope you like like it and if you do have a go at making one yourself please send me a link in the comments section below, Crafty Hugs T x

28 November 2015

Autumn Butterflies - Tutorial 9

Autumn butterflies.

I recently discovered vertigo and loved the effects and wanted to see just how I could use it along with the items I already have in my craft room.


Difficulty;   Intermediate-advanced
Time;  ¾ -1  hour 

Materials;
Imagine Crafts :Vertigo (breeze)
Tsukeniko Rich Cocoa Memento ink pad
Ranger :  Alcohol inks - Cranberry, butterscotch and Oregano,  blending solution and  blending tool, 
Paperbabe stamps:  Sentiment stamp
Tonic studios:  Rococo Butterfly die
Cuttlebug: die cutting machine
Xcut: circle dies
Green card, white card, adhesive, 4 purple eyelets, eyelet setting tool, 8x8 photo box frame.


Directions;


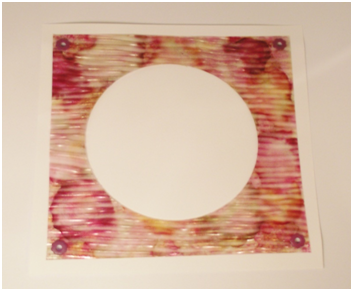
  • To cover the vertigo add drops of the alcohol ink and blending solution to the blending tool and dab over the surface, if you want a more vivid colour add more ink and less blending solution.


 • Cut a circle aperture out of the Vertigo using a circle die and die cutting machine


•  Cut a circle from the green card the same size as the aperture and a slightly smaller white circle, Stamp the sentiment on to the white circle with the Memento Rich Cocoa ink.


•  Using the butterfly die; cut one with the green card and one with the white card. The white one will need to be coloured using the Cranberry alcohol ink in the same way we coloured the Vertigo. Cut the flourishes away from the butterflies as pictured.


•  Cut a piece of white card an inch bigger than the vertigo and attach them together using eyelets in the 4 corners.


•  Mat and layer using a piece of green card that is slightly bigger to give a border of green tying the colours together.


 • Glue the circles into the center of the vertigo and add the butterflies one on top of the other, I glued the green one flat and curled the wings of the cranberry one using the barrel of a pen and then stuck this on top.  I placed the flourishes diagonally below to balance the design.


Your finished project could be attached to the front of an 8x8 card blank or put into a box frame to use for home décor as I have below.


If you like this framed piece of art you could win it, by visiting my Facebook page Home is where the craft is where I a running a giveaway Tx

27 November 2015

Paperbabe Stamps - Challenge 22 Picture Inspiration

Challenge 22 - Picture Inspiration

Good Morning everyone,

Over at Paperbabe stamps we have a new challenge for you on the blog today! You could be in with a chance of winning some Paperbabe stamps goodies. 

The theme is "picture inspiration", you can use the colour or the picture itself as inspiration to get creative.


You can find all the details on how to enter at the Paperbabe stamps blog. Here's my picture


I used the Folk Fabrique stamp set to create flowers using the peacock feathers. I then coloured
  it in with Alcohol markers, matted and layered with coordinating card stock, added some pearl gems and a sentiment.


>>>>> BLACK FRIDAY TO CYBER MONDAY SALE <<<<<
>> Enter BLACKFRIDAY to receive 15% off when you spend £5 <<

I hope you join in with the fun. T x

26 November 2015

Thanks giving Giveaway

Happy Thanks giving everyone.

Today had me thinking about what I am thankful for and obviously I am thankful for my husband and happy healthy children but also I am thankful for all my followers, the support and feedback I have received. So I thought what better way to show you how thankful I am than by doing a giveaway.

Up for grabs are 3, yes 3 prizes;


1st prize is this framed creation made by me


Second prize is a calendar created with Craftwork cards Rosa kit and docrafts Gorjuss embellishments


Third prize is this Male themed calendar made with Craftwork Cards take-it-easy-collection


To be in with a chance of winning you need to go over to my Facebook page "Click Here" and like, share and comment on the pinned post with what you are thankful for.

The winner will be announced on Friday 4th December at 6:30pm, entry closes at 4pm on Friday 4th December.
This giveaway is in no way endorsed or affiliated with Facebook.
Good luck everyone. T x

24 November 2015

Mandala Magic - Julie Gibbons

Hi Guys and Girls

A quick post to tell you all about the wonderful free workshop by Julie Gibbons that I am taking part in. It's a 5 day workshop exploring Mandalas, there history, meaning and how to create them.

Julie Gibbons is a new discovery for me, I have always liked Mandalas as I am very attracted to patterns and colour, as a young child I would draw interlocked and overlapped circle patterns and colour them in whilst other children would draw more "detailed" pictures.

I am a firm believer that art is a personal thing in terms of both how it is viewed and made. I don't think there is a right and wrong and do get cross when Art teachers criticise children's work.

Over the next few days I hope to have a better understanding of the Mandala and create some beautiful pieces of art.

I will be sharing my work here and also on my facebook page.  Julie Gibbons is running a 2016 Mandala Magic workshop, details can be found on here website below.

http://www.juliegibbons.com/

Hugs T x

23 November 2015

Docrafts - Spotlight post

Good Morning crafty people,

I hope you all had a good weekend and haven't been affected by the cold too much, it's certainly been staying indoors and crafting weather.

Today see's another spotlight post, this time I am focusing on docrafts.  If you are a crafter and lets face it you wouldn't be reading this if you weren't, then you will have heard of or used docrafts products before.

Docrafts sell numerous craft related products from brand names such as Papermaina, craft planet, Anitas, xcut and stick it to name a few. To quote their website their products are  "aimed at beginners to high end items perfect for enthusiasts"

Over the years I have tried many of their products and have never been disappointed in them at all. Here are a few cards I have made this year using their kits;


99% of what you see in the pictures is docrafts product including card blanks and adhesive. Actually all of the adhesive I use except for Candi fix is from one of the docrafts ranges.


Do crafts products are stocked by many retailers including The Range, Hobbycraft and Createandcraft.tv. Their website is packed full of fantastic inspiration, events listings, product details and much much more.

If you've never tried their products maybe pop over to their website and have a browse of the extensive items on offer.

I'll be back soon with another post but until then take care Tx

21 November 2015

Craftwork Cards - Spotlight post

Hello everyone

Today see's me continue my spotlight posts which focus on a different craft company each time, as the title suggests today's company is Craftwork cards.


Those of you who follow me on social media will probably know by now that I am a die hard CWC (Craftwork Cards) addict, sorry I mean fan.  I love everything about them from their style, quality, pricing and staff.

Like many others, when I first started to dabble in crafting I  picked up cheap bits and pieces that I thought I could make things with, but I found it hard to coordinate them and create striking quality items.  Then one day I stumbled upon Craftwork cards and my crafting changed for ever.

Here are a few projects created using their products;


This tea pot card was created with the Afternoon Tea collection.


Ths alarm clock is from the Bohemian Dreams kit.


A bobin card using the Fab fabric collection


Guilty pleasures is the name of the kit I used to make this card


Love a cuppa is such a yummy kit, soft retro colours 


The potting shed II is a follow up to the hugely successful potting shed kit


Suits you sir is one of the male focused kits


As you can see from the themes of the cards above Craftwork cards has something for everyone, the kits coordinate perfectly and help guide you but dont restrict your creativity.  Julie Hickey is the demonstrator for the company, she is a very down to earth and friendly lady who is full of tips and easy to follow demos, she can be seen on Create and Craft TV and at several major craft shows around the country.  There is also a very active fan group on facebook, full of wonderful pictures, support and advice.

I hope you will have a look at there website and consider them when you next purchase craft items.

Happy Crafting Tx


20 November 2015

Folk it! - Spotlight post

Happy Friday lovely people,

Well it's been a busy old week here, creating projects, taking photos and blogging so I've taken a moment to relax and look back through some of my past makes and reflect on my achievements.

For this post I am going to focus on my crafting with folk it! products.

About a year ago I was sat flicking through the TV schedule for create and craft and noticed a show called Folk it and as you can imagine I had no idea what it was all about so cup of tea in hand I settled down and watched.

As it happens folk it are a small company who specialize in painting kits that enable anyone (yes, really anyone) to paint stunning folk art pictures.  Carol demonstrated how easy it was to create little roses on a wooden heart with a dotting tool, no brush required!  I couldn't believe it, Straight away I got on the phone and ordered the kit and from that moment I was hooked.

Here is a picture of my first Folk it Project;


All those little roses were created with two dots of paint and a little swirl movement.


Since buying the starter kit I have brought 5 further kits, some of which use a paintbrush but don't panic; each kit come with a DVD and booklet with step by step instructions. Here are a few of the creations so far;


I'm still learning and improving my skills, sometimes I make mistakes and want to through the project away but I keep them to look back on and then appreciate how far I've come since.

If you have ever wanted to try painting for relaxation or decorative purpose then this is for you.

I love my Folk it kits and sometimes have to stop myself folking everything in my house as it is addictive but hey would a good addiction to have!

I hope you'll give it a go, Folk it have a fantastic Facebook page with lots of pictures so if your tempted why now have a look there and see what you could create.

I hope you all have a wonderful weekend.

T x

#folkit