30 September 2016

Paperbabe Challenge #43 - Anything goes

Today we have an old favourite for you on the Paperbabe Stamp Blog

An "Anything goes" challenge


So lets get creative and make something awesome.  

Here's my DT Inspiration


Here's a couple of close ups


To join in with the challenge stop by the blog and use the Link up to add your project and whats even more awesome is that you could be winning a prize from Kim at Paperbabe Stamps.


29 September 2016

World Cardmaking Day 2016


To celebrate world cardmaking day 2016 which is this Saturday!  I am running a giveaway over on my Facebook page https://www.facebook.com/where.the.craft.is/

All you need to do is post a picture of a card you've made with the Hashtag #worldcardmakingday and I will pick a winner and send them a crafty prize.

Good luck 

25 September 2016

Live life Now - Visible Image

Today I thought I'd share something a little different,  a wall hanging that I created last week using Visible Image stamps and the Gelli Plate.

I had a idea that I wanted to create something that expressed a poignant message while being a bit fun too............


I had created several black and white prints on my Gelli Plate and knew I wanted to do something a little different with them so I started by tearing htem into strips and gluing them to a piece of hardboard using Mod Podge Matte finish. I also cut several hexagons from the same papers and added them. Once dry I highlighted areas where papers met using a White Posca pen.


I used one of the skull stamps from the "Mr Bone Jangles" set and heat embossed a few of them Using White embossing powder.  I also embossed some Ripples from "The ripple effect" set but this time used Black embossing powder.


I stamped, embossed and fussy cut Mr bone jangles himself to add to the hanging, I wanted a little more texture behind him so placed him on "tuck in" die cut from Tattered Lace.


I added some distress ink to Mr Bone Jangle so he wasn't to stark and looked more muted. I also wrapped the edge of the board with Duck tape.


I stamped embossed and cut out a sentiment from the "Tomorrow doesn't exist" set and added the to the left of the hanging, again adding some distress ink to continue with the colour theme.


The sentiment "Live like tomorrow doesn't exist" together with the skeleton gives us all a reminder that we need to live now and enjoy our lives...........(wow, that got a little deep)

Here's a list of the stamps used to create this project;


Thanks for taking the time to stop by, I'd love to know what you think of my project so please leave me a comment T x

22 September 2016

Beautiful flowers - Altenew Painted flowers

Today I am sharing a card I created using Altenews Painted flowers stamps and dies.


I started by stamping the flowers in Jet Black crisp ink onto 350gsm super smooth card, I then used the lamination layers for the flowers in shades or pink and lilac.  

One of the (many) things Altenew do so well is provide a stamping guide to show you which layers go together to make your finished flowers, here the one for the stamps in this project


At first the colours look a bit funky and not very realistic but as the ink seeps into the card the colours become more muted and merge together to give a lovely effect.


I then die cut the flowers using the coordinating dies. I drew a circle onto a 6x6" card blank and stamped my chosen sentiment in the centre.  I added the flowers over the circle to create a wreath. I used foam tape to add dimension when placing the flowers.
All that was left to do was add a few sequins and some lilac washi tape.

The products I used are;


I hope you've enjoyed today's post, I'l be back with more crafty creations soon T x


19 September 2016

Even in our darkest moments

Thank you for stopping by to check out my most recent make.


Today I am sharing a card I made using my new Gelli Plate and Visible Image Stamps.


I started by creating a background on the Gelli Plate using Pebeo Acrylic paints and Bubble wrap.  When it was dry I stamped the hanging lights in Versamark Ink and heat embossed them with Black embossing powder.  I also heat embossed the sentiment in the same way.


The small moths were stamped in black Versafine ink. I created another mono print on the Gelli Plate this time in orange, red and yellow tones which I used to stamp the Large moth onto and then heat embossed in Black.  I decided that the Moth would look fab if it was fussy cut and had it's wings curled slightly.


I added some Mercury glass stickles to the light bulbs and then distressed the edge of the paper before matting it on to a 5x7" card blank.


I love the quality and detail of Visible Image stamps and can see hours of stamping fun ahead.

If you would like to purchase the stamps I used to make this card you can them here

T x

16 September 2016

Paperbabe Challenge #42 - Design team inspiration

Thank you for stopping by, today I have a project which I created for the new Paperbabe Stamps Challenge.

Yes, you heard me right. Today we are starting a new challenge over at Paperbabe Stamps blog. The theme is
"Wings"

As always there is a chance to win a prize from the lovely Kim Costello at Paperbabe Stamp.

To join in with the challenge stop by the blog and find the linkup to add your work.


Now onto my DT inspiration


This was a work of love and took me almost a week to complete as there were lots of different processes that took place.  It all started with a reclaimed scaffold plank and several Pebeo paint products.

I used the Head, Torso, Hair and Wings template from Paperbabe Stamps and finished it off with the "Go where your dreams take you" stamp.


Join me on Monday for something which I have never tried before.
Have a super weekend
Tx

12 September 2016

Go where your dreams take you

Happy Monday

Today I am sharing a 5x7" canvas that I created recently.


I decided that I wanted to go bright and bold with the colours for this project, I can at times be a little cautious and stuck in a rut with my colour choice, just as I am in my clothing colours.....

I used acrylic paint applied with a sponge, I also applied some white paint through a stencil and splatted some using a toothbrush. When dry I added some glossy accents to add dimension and reflect the light.

Next I stamped the Inkognito eye from Visible Image and embossed it in black. I stamped the sentiment on white card and then tore it into a few pieces so that I could add it to the canvas and fill some of the blank space.

I really am happy with how this project turned out and I will continue to be bold with colour and follow my dreams.

T x

10 September 2016

I brought some brushos...............

I've heard lot of people talk about Brushos previously and didn't take much notice but yesterday I went to a craft shop and saw them priced at £1.43 each and thought why not give them a try.

I only purchased 6 pots to start with as I thought I'd see how it goes.  When I got home my daughters were excited and wanted me to try them out straight away.

I decided not to remove the lids but to make a small hole in it and use it as a shaker pot. As with all my inks/pens/powders I made a little colour swatch for reference.

I decided to that the first thing to do was just sprinkle some onto wet card and see what happened.


As you can see when the powder hits the water it dilutes and bleeds, each colour is made up of  several colour pigments so when you sprinkle in this way you get to see all the variations of colour.


The pink powder has an amazing array of colours in it.

I carried on just adding colour onto my card and spritzed it if it needed it. I decided that I liked my sample so much I would use it for a background on a card.


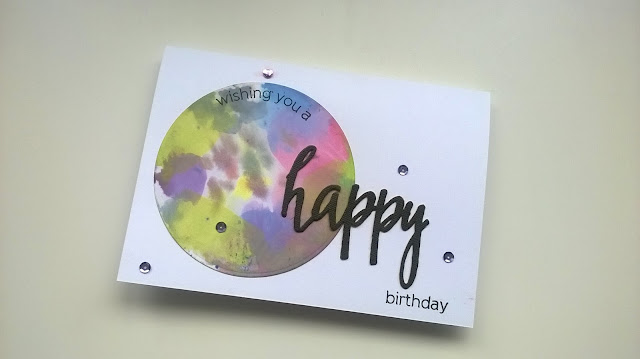
After making my colour swatch sheet I had some colour left on my glass cutting mat and my Daughter suggested that i "smooch" a piece of card into it to pick up the colour. All that I had to hand was a die cut circle. I patted it into the colours and left it to dry.

Here's what it looks like


I really liked the grungy planet effect and thought it would look cool as a focal point on a card.

For both cards I used Halftone happy stamp and die set from Altenew.

I can see a lot of fun to be had with these coloured powders and of course I will share it all here and also on my facebook page.

T x


05 September 2016

Live life now

Good Morning

Well life is starting to get back to normal after the summer holidays, my girls went back to school this morning so that means more craft time for me....

Today I am sharing a card I created at the weekend using some of my favourite crafting items.


I created the background using Lindy's Magicals and then stamped the image and sentiment in veramark ink and applied copper embossing powder. The detailed butterfly was embossed onto vellum and fussy cut.


I love the dimension and feel of movement this gives the card.

I will be entering this card into Craft Stampers take it make it competition.


I used the follow products to make this card

Visible Image;

Lindy's Stamp Gang;

Papermania;

Thanks for taking the time to stop by, I'll be back later in the week with more crafty makes.
T x


03 September 2016

Beautiful Day

Yay, It's the weekend

Today I am sharing a card I created using Altenew's Beautiful day stamp set.

I've wanted this stamp set for a while and was waiting for it to come back in stock and no sooner was it through my letter box than I had it on my craft desk and set to work.


I used Altenew's Summer afternoon ink cubes for the flowers and Green fields for the foliage and sentiment.

I am entering this card into Craft Stamper Take it, Make it competition.

Thank you for stopping by, I hope you have a great weekend.

Terri x

02 September 2016

Yummy cakes

Today I am sharing a card I made to enter into a couple of Challenges


I made this card using the following products 


The images were stamped in Memento Tuxedo Black and coloured with Promarkers. I added glossy accents and stickles to the frosting on the cakes.

All those cakes have made me hungry

I am entering this card into
Craft Stamper Take it Make It Challenge
Seven Hills Crafts September sketch challenge

T x

Paperbabe Stamps challenge #41 design team inspiration

We have a new challenge up on the Paperbabe stamps blog today

Picture inspiration is the theme


Use the picture above to create anything you want, be it a card, journal page or scrapbook layout. You can flip it, rotate it, it's up to you this is your chance to get creative and be in with the chance of winning a prize, oh did I say prize?

Yes, you could win a prize from Kim at Paperbabe stamps for sharing your project with us.

How do you enter I hear you ask, well use the link "Click here" and you will find all the details on how to link your project.


Now for my design team project................


I created my card using Mayleedee little red stamp set, I stamped the image and sentiment in Black versafine ink, I then used versamagic to stamp the Pop Dots border and sprinkled it with gold embossing powder. As I stared to tap the embossing power I noticed it was also sticking to the black ink links (this has never happened before) I then used a versafine pen to add splodges and embossed them also. Rounded corners and black matting and layering finished off the look.

Thanks for stopping by x

01 September 2016

Tattered Lace Shadow collection - Design Team samples

Today I am revealing my design team samples for Tattered Lace's Shadow die collection which launches tomorrow at 12pm on Create and Craft TV. 


This first card is something very different for me, I love the autumnal theme and colours. I die cut the girl 3 times, one layer I cut into elements to colour and the others I glued together to give a faux chipboard effect.


This was a very simple card, just a few gems, stickles glue and a bow were all that I added.


I adore the wintry scene this card showcases. I added some white snow to a piece of acetate using a Posca pen and then added some stickles for a glistening look.


This is my first ever twisted easel card, I used some paper flowers which I coloured using Promarkers to match the overall colour of the card. The butterfly is from the Pentagon box collection.


A simple aperture card, I love grey and pink together....


I had so much fun making this card, I woke up in the night with the idea for the ribbon, the paper used on the base of the card was black and white but I used an ink pad and water to give it a loose watercolour effect. I continued the colour theme by using the ink pad to colour the little flowers too.


I hope you'll tune in to Create and Craft TV tomorrow at 12pm to watch all the amazing demos and see more samples from the very talented design team.
Terri x