29 May 2016

Stamping fun

Yay, it's bank holiday weekend and half term. That means lots of family time and more crafting fun.


I wanted to share some cards I've made recently from all those bits you try out and put to oneside.

I love stamping and trying out new techniques to create backgrounds, so here's a few


I used a messy watercolour effect for this card, using distress ink and water.


This time I splogged distress ink onto a craft mat, sprayed a little water and layed the card on top, when dry I added the stamped images.


I coloured the butterflies using distress ink applied with a wet brush, quick and simple.


This card was created in the same way as the one above. 


I blended distress ink onto white card and sprayed with water, once dry I flick white water colour on to the background and then stamped the gorjuss girl.


This was a really fun card to make, I blended some alcohol ink on to some glossy cardstock using blending solution, I then added some droplets of alcohol ink on top. Once dry I added the sentiment and flourish using black Stazon Ink.

I hope you like today's cards and have fun creating some of your own.

27 May 2016

Honey Bee Stamps Design Team 2016 Entry

Today I am applying to join the Honey Bee Stamps design team.  As part of the application I need to showcase my work, so here goes;


This card was created with a messy water colour technique using Distress Inks, I love the vibrant colours with black overlayed images.


This card features a lovely dragonfly image which I coloured with Lindys Magicals, they are a metalic pigment which can be used in so many ways. Below is a close up of the shimmer


I also used a splatter technique to add a little extra 


This card is a simple Monochrome, I used heat embossing to add depth and dimension followed by a spritz of metallic grey


For this card I created a Distress Ink background which I sprayed with water and heat set, I then stamped the image and sentiment on top.


This card was made using a collection of papers and I added a stamped sentiment, I love typography and how different fonts can give a really feeling to a card.


This card show how a simple sentiment stamp can be the main focus of a card, a few accents in gold just finished it off.


This card has a stamped background in black and white with a topper I created using a Distress Ink water colour ombre effect. I then stamped in Jet Black and added 3 sequins.


As you can see I am a big fan of stamping and love to use stamps with different techniques.

I'll be back soon with more crafty projects.

Tx


Paperbabe challenge 37 - Sketch


We have a new challenge on the Paperbabe stamps blog today and the theme is "Sketch"


Use the above sketch in any creative way that you want, flip it, turn it be inspired by it. The flowers can represent any image and "paperbabe stamps" any sentiment. Please use at least one paperbabe stamps product in your creations and HAVE FUN!


Here's my DT inspiration;


If you'd like to join in and have the chance to win a prize from the wonderful Kim then pop over to the blog and submit an entry.

26 May 2016

Rustic Romance by Craftwork Crads

Yesterday I recieved my Rustic Romance kit and I am so in love with it.

It's a very feminine kit with washed out roses on a white plank background and soft blue and pinks.

Here are my first 5 cards I made


This tag card uses the paper from kit and a tag die set from Tonic, all I added was a bit of glitter glue and some ribbon.


For this card I die cut a hear from the roses panel paper and stuck it over the blue dotty paper. I added some glitter glue around the aperture and on the candi. The letter tiles are also from the kit, as is the tag.


This card is made using 1.5" circles folded around a 1" square, I accented with pearl drops and glitter glue.


This is a simple card made using 8 squares with a heart cut out of them. I've kept all the hearts to use on another card in the future.


I love this card, 1 sheet of paper, 1 sentiment and 3 candi, so simple yet so effective.

I am sure their will be many more cards to share using this kit.

I hope you like them, more from me tomorrow Tx

21 May 2016

Craftwork cards fan page competition

It's a yucky rainy day here in Bristol so what better way to pass the time than a bit of crafting and a quick blog post.

As you know I am a BIG Craftwork Cards fan,I love their products, prices and how friendly the staff are.  Over on Facebook there is a Craftwork Cards Fan Page run by a lovely lady called Natalie. Each month there is a competition with a prize from Craftwork Cards.

This months theme is "No girls allowed" meaning it's all about cards for the men in our life. Here is a peak at my entries;


For this card I used the Man Made kit and created a little pinwheel in a pocket, I used a orange card for matting and Layering to add a little something.


This card was again made with the Man Made kit. I cut some star appertures from white card and laid it over a tartan print. I added tiny navy blue dots along the top and bottom edges of the overlay to look like stitches.


This last card is made with the Suits You Sir collection and the newly released Colour me stamps.

If you've got any Craftwork cards goodies why not like the Facebook page and enter the competition.

I'll be back soon Tx

20 May 2016

Robins Nest Design team project - Garden Gate

Good Morning crafty friends, I hope you're well. Today I have a little sneak peak of a project that I have made for The Robins Nest.


As always if you would like to see what I have made then please click on the link below, I'd love it if you could leave me a comment.

http://chatteringrobins.blogspot.co.uk/

If I dont speak to you before, have a lovely weekend T x

17 May 2016

Fabulous Fashionista pleated card - Tutorial 16


Today I have a lovely tent fold card to share with you, made using the Fabulous Fashionista kit.

To make my card I used an 8x8" card blank which I cut down to measure 12x18cm, don't throw away the off cuts as they can be used for so many more things. 


I then cut a piece of the pink foiled paper to 11x9cm


I cut a piece of the lace graph paper to 11x8cm


and a piece of black card measuring 11.3x17.3cm


I glued them patterned papers to the black card using double sided tape 


I then cut a piece of black card measuring 8x29cm and cut it at a diagonal angle going from 8cm to 4.5cm. I then scored it and folded it


I added red liner tape in the folds and stuck them down


I attached the pleated black card to the panel created above


next I tied some black and white bakers twine around the card


I added the panel to the tent fold card, placed 3 black gems in the bottom corner and stuck a sentiment on with foam pads.


I hope you like it 


13 May 2016

Paperbabe Stamps Challenge 33 - Black, White and one other colour


Good morning Crafters

We have a new challenge up on the Paperbabe stamps blog today and the theme is "Black,  white and one other colour" As always there is a chance to get your hands on a crafty prize from the lovely Kim.

Here's what I made;


I created my card using the Birthday wishes stamp set, I stamped on to white card using Black Versafine Ink and then matted and layered on to black card. my card base has gold foil tape down both edges, I stuck the stamped panel on and wrapped it with bakers twine and scattered a few sequins for added sparkle.

I love the clean elegant look of the gold against the black and white.

I really hope you join in with the challenge and I look forward to seeing your creations.

Terri x

09 May 2016

Craftwork Cards Fabulous Fashionista - Part 2

What a wet Monday it's been!

I have been busy making cards and trying to tidy up my crafting supplies but thought I'd share the next batch of cards I have made with the Fabulous Fashionista collection, If you haven't seen part 1 you can find it here

This collection is so stylish with several different paper patterns to choose from


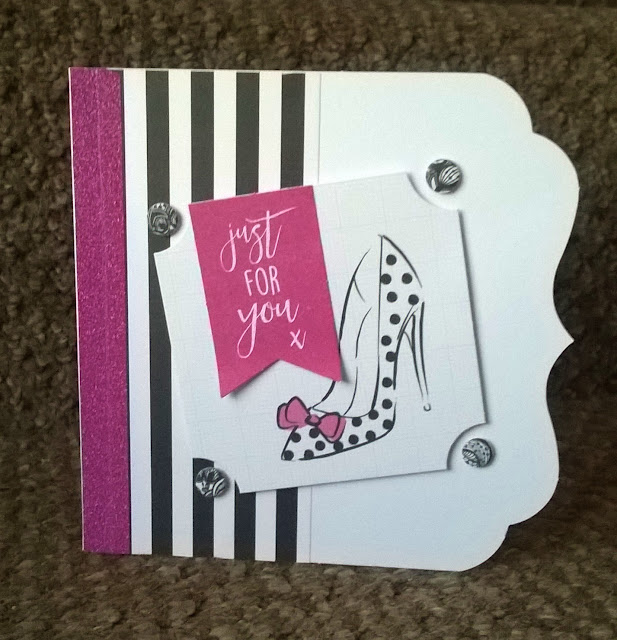
This card is something very different for me but I like it


A quick and easy handbag card


I am loving sequins at the moment as they really add something extra to your projects


This card uses less then a quarter of a sheet of paper from the kit, I cut the lady out added a offcut of the hounds tooth paper and stamped a sentiment.


As well as sequins, foiled glitter tape seems to be one of my go to's at the moment. I love how simple this card is, just simple cutting and gluing.


Black white and gold work so well together and create a very elegant look


This card came about when I had creative block, I was sat moving things around on my table, getting a little grumpy and when I looked at the pile I had moved this card had all but put itself together.

I imagine that I will be creating several more cards with this kit as it is so nice to work with and it's a BIG kit.

T x 

06 May 2016

Robins Nest design team project

Hi Guys

Today I have a project over on the Robins Nest blog, if you'd like to see what I made with these products then click Here to vist the blog.


I'll be back soon with another post soon.

T x