Today I am sharing an easy tutorial on how to create this beautiful card using Trimcraft's Bee Happy collection.

I will be using the 12x12 paper pad, the stamps set,and the little bee charms. I will also use Altenew's sand dunes crisp mini ink cube, Versafine vintage sepia ink pad and some beige bakers twine.
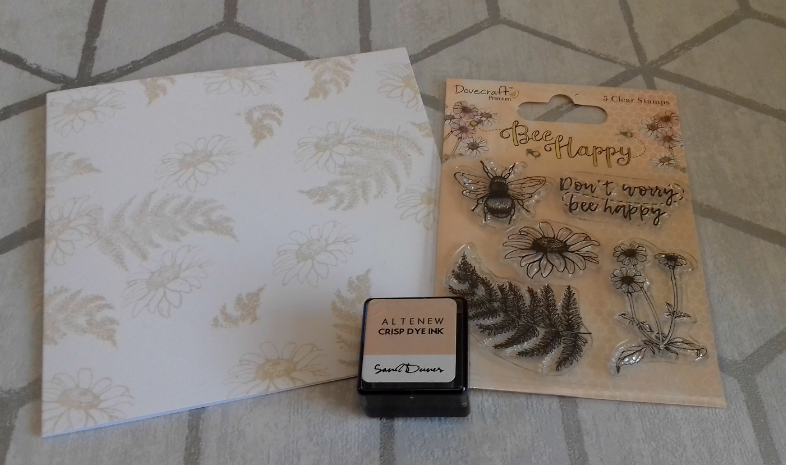
Working on a 6x6 card blank I used the Altenew sand dunes ink to stamp some foliage and and flowers on my card. I always stamp off the edge to give the look of a trimmed piece of backing paper.

Next I cut a piece of the paper from the pad to measure 5.5x5.5" and then die cut 2 circles to create an aperture and a circle topper/mat.

I applied the die cut pieces using foam pads to add depth and dimension to the card. You can still see the stamping that I did in the first step.

I die cut another circle from the paper pad and stamped my sentiment using the vintage sepia versafine ink, I adhered this using double sided tape.

Using the bakers twine I wraped it around the left hand side of my card twice and tied it secure. I then added the cute little Bee charm, it's so adorable. The person who receives the card could take it off and add it to a necklace or braclet.

I stamped 2 Bee's onto white card and coloured them using the Altenew sand dunes ink and then fussy cut them. I added them onto foam pads and placed them in the white space, overlapping the patterned paper, this ties all the piece together and give a cohesive look.

Here's a look at the finished card from a funky angle to show the depth of the layers.
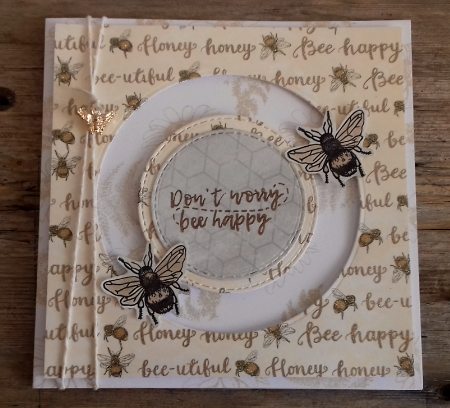
And here it is in all it's glory. It's going to be hard to give this one away but I'm sure whoever receives it will be more than happy.
Thank you for stopping by today, Let me know what you think of my card in the comments below.
Terri x
Hi this is a stunning card I love it. Take care. Hugs Jackie
ReplyDeleteA fabulous card. Great design x
ReplyDeleteFabulous card
ReplyDeleteSuper design, love the little bee charm, great card.
ReplyDeletexx